Research
The 2 Euro Coin
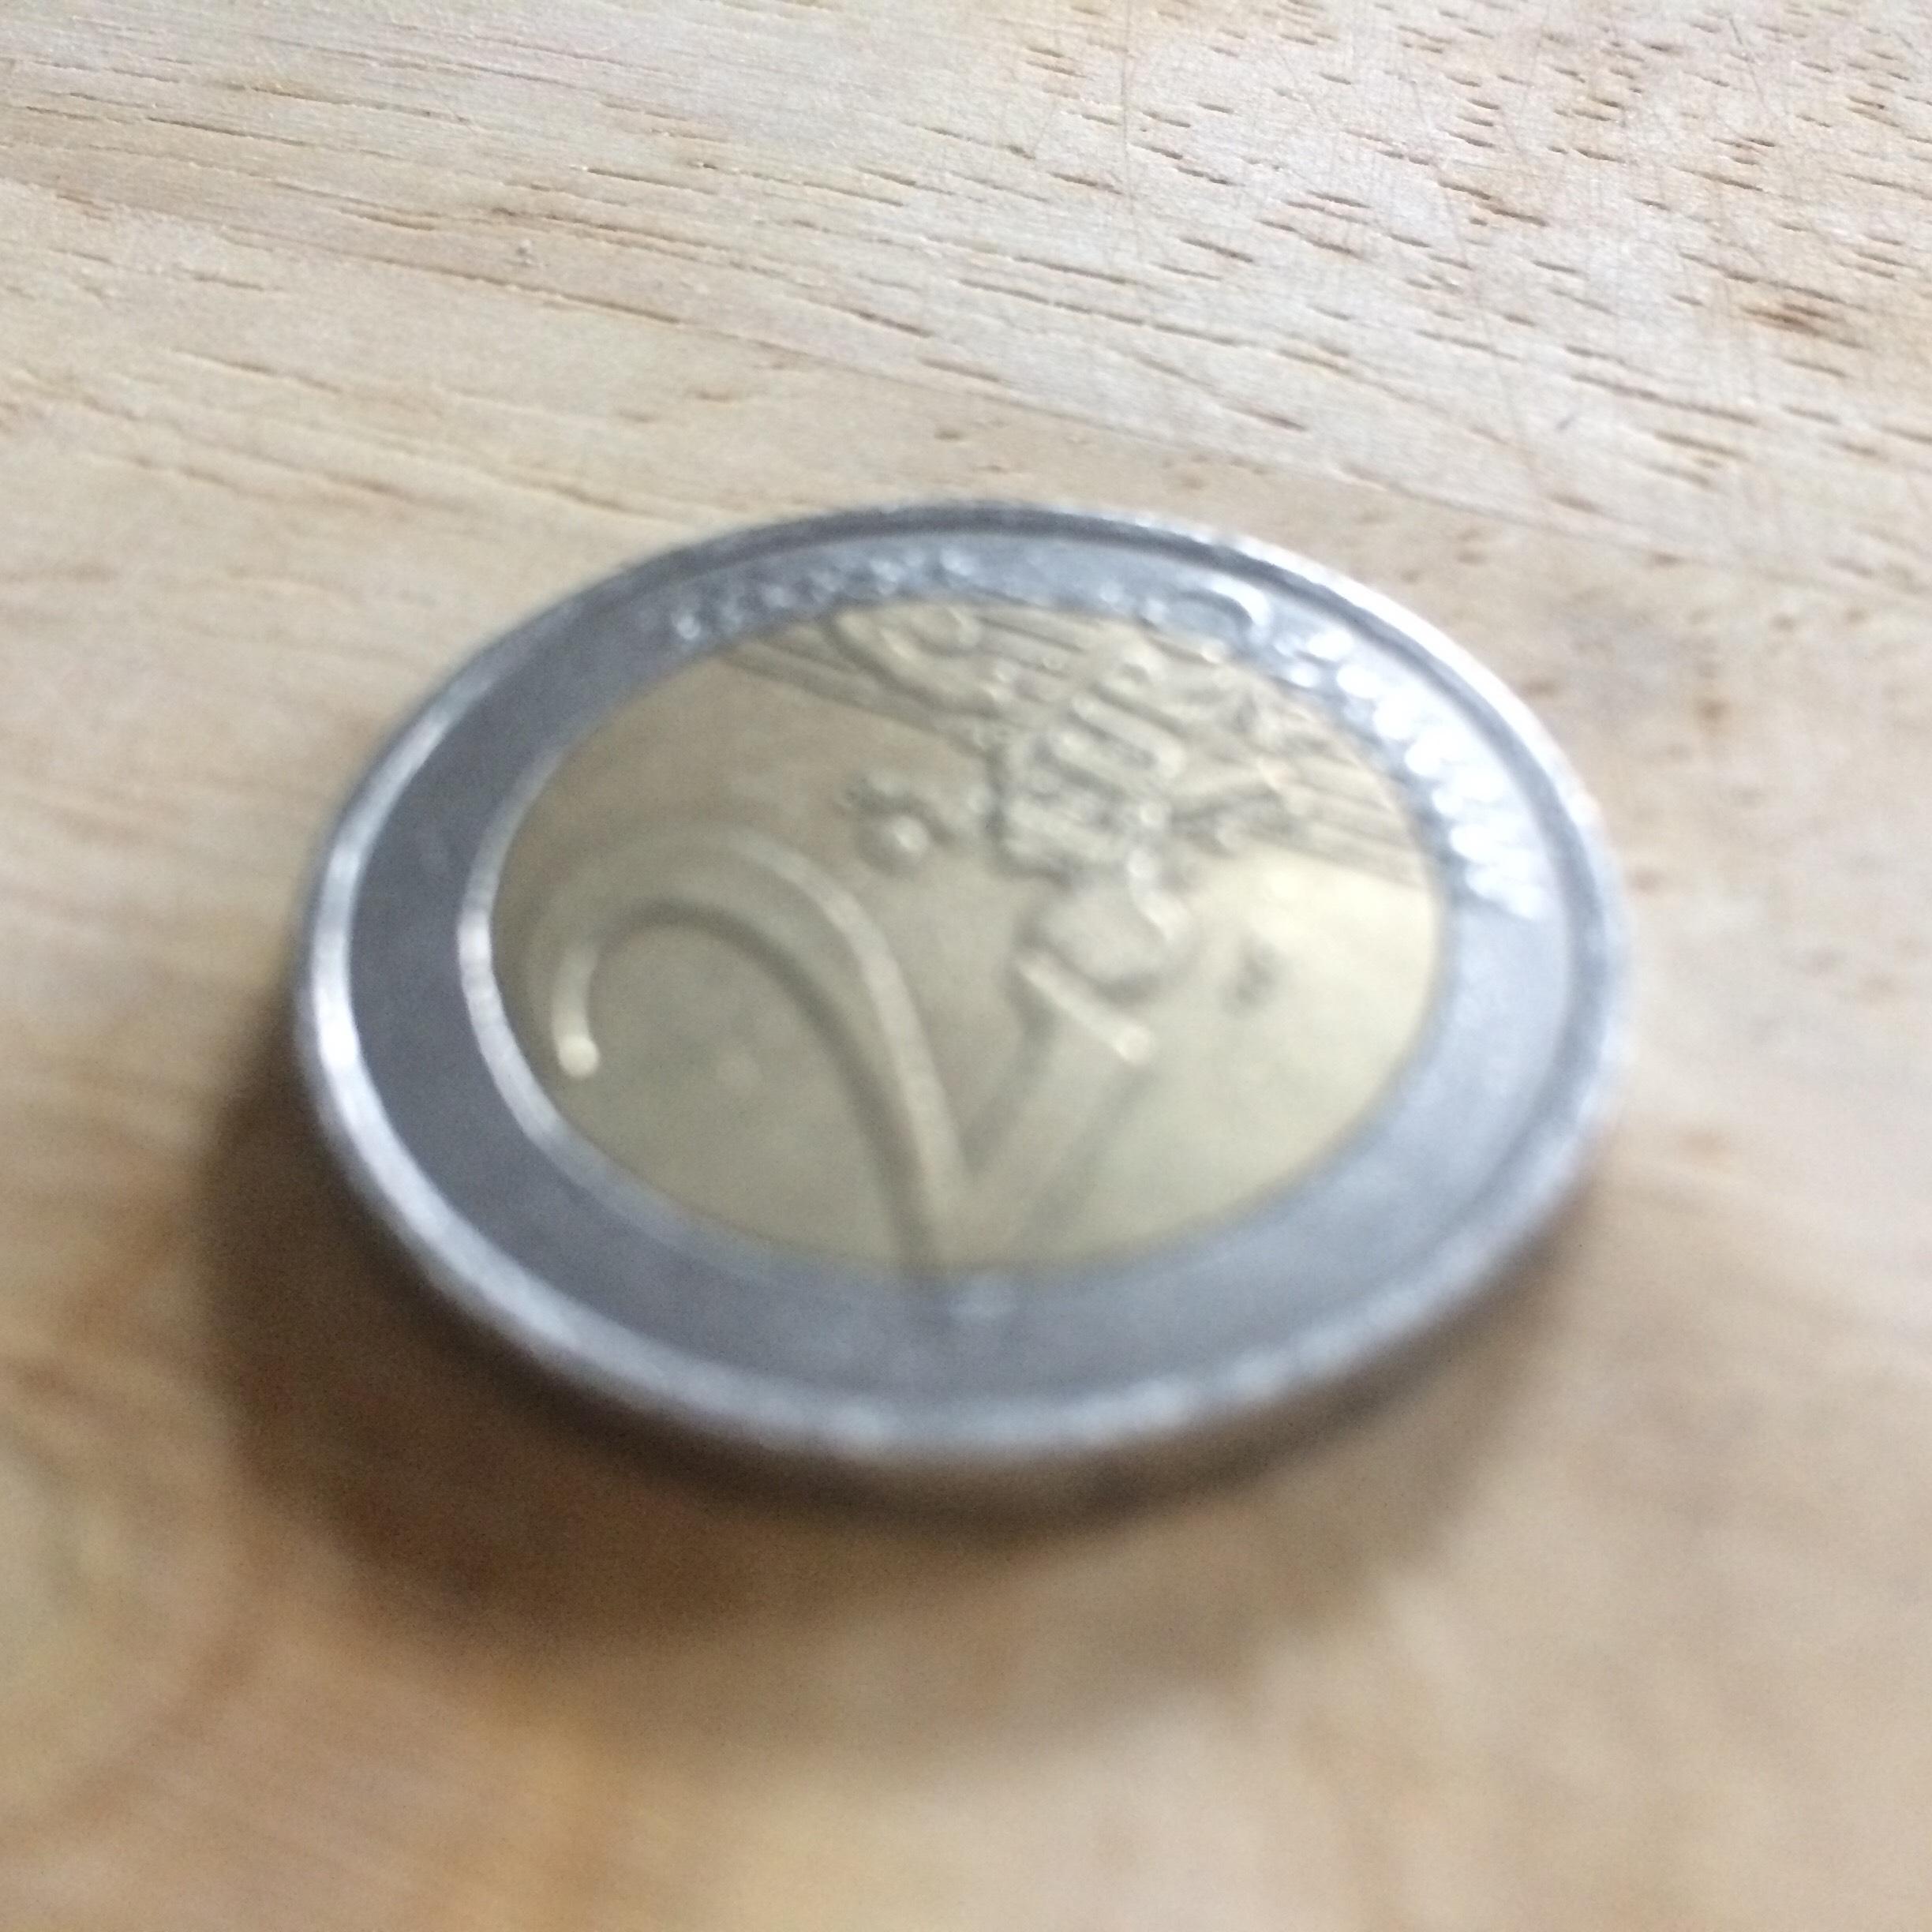
Physical: Disk shaped coin where the inner core and outer ring are gold- and silver tinted metals. The coin is textured with the emblem from which European country it is originated and with how much it is worth. Other than the Canadian dollar it is more easy to determine the coin it’s value.
Electrical: The coin it’s core and ring are both conductive. The conductivity remains to exist when an array of coins is made.
Structural: Feels strong, impossible to break or flex it by hand.
Perceptual: Then coin is made of metals so whenever the coins is lying somewhere cold, it will feel cold itself. But when holding a coin in a sweaty handpalm, the coin will be warm. So the coin is also a conductor of heat- and coldness. Almost every person knows the sound when a coins enters a full wallet (of coins). Or the distinguisable sound when someone wins slots at las vegas. The coins smells a bit duff, probably because it has been in places I do not want to know.
Aesthetic: Other than coins of less value which are (in Europe) mostly made of a single brass/bronze/copper colored metal this coin represent more value because of the different materials used for the inner core and outer ring.
The kryptonite lock
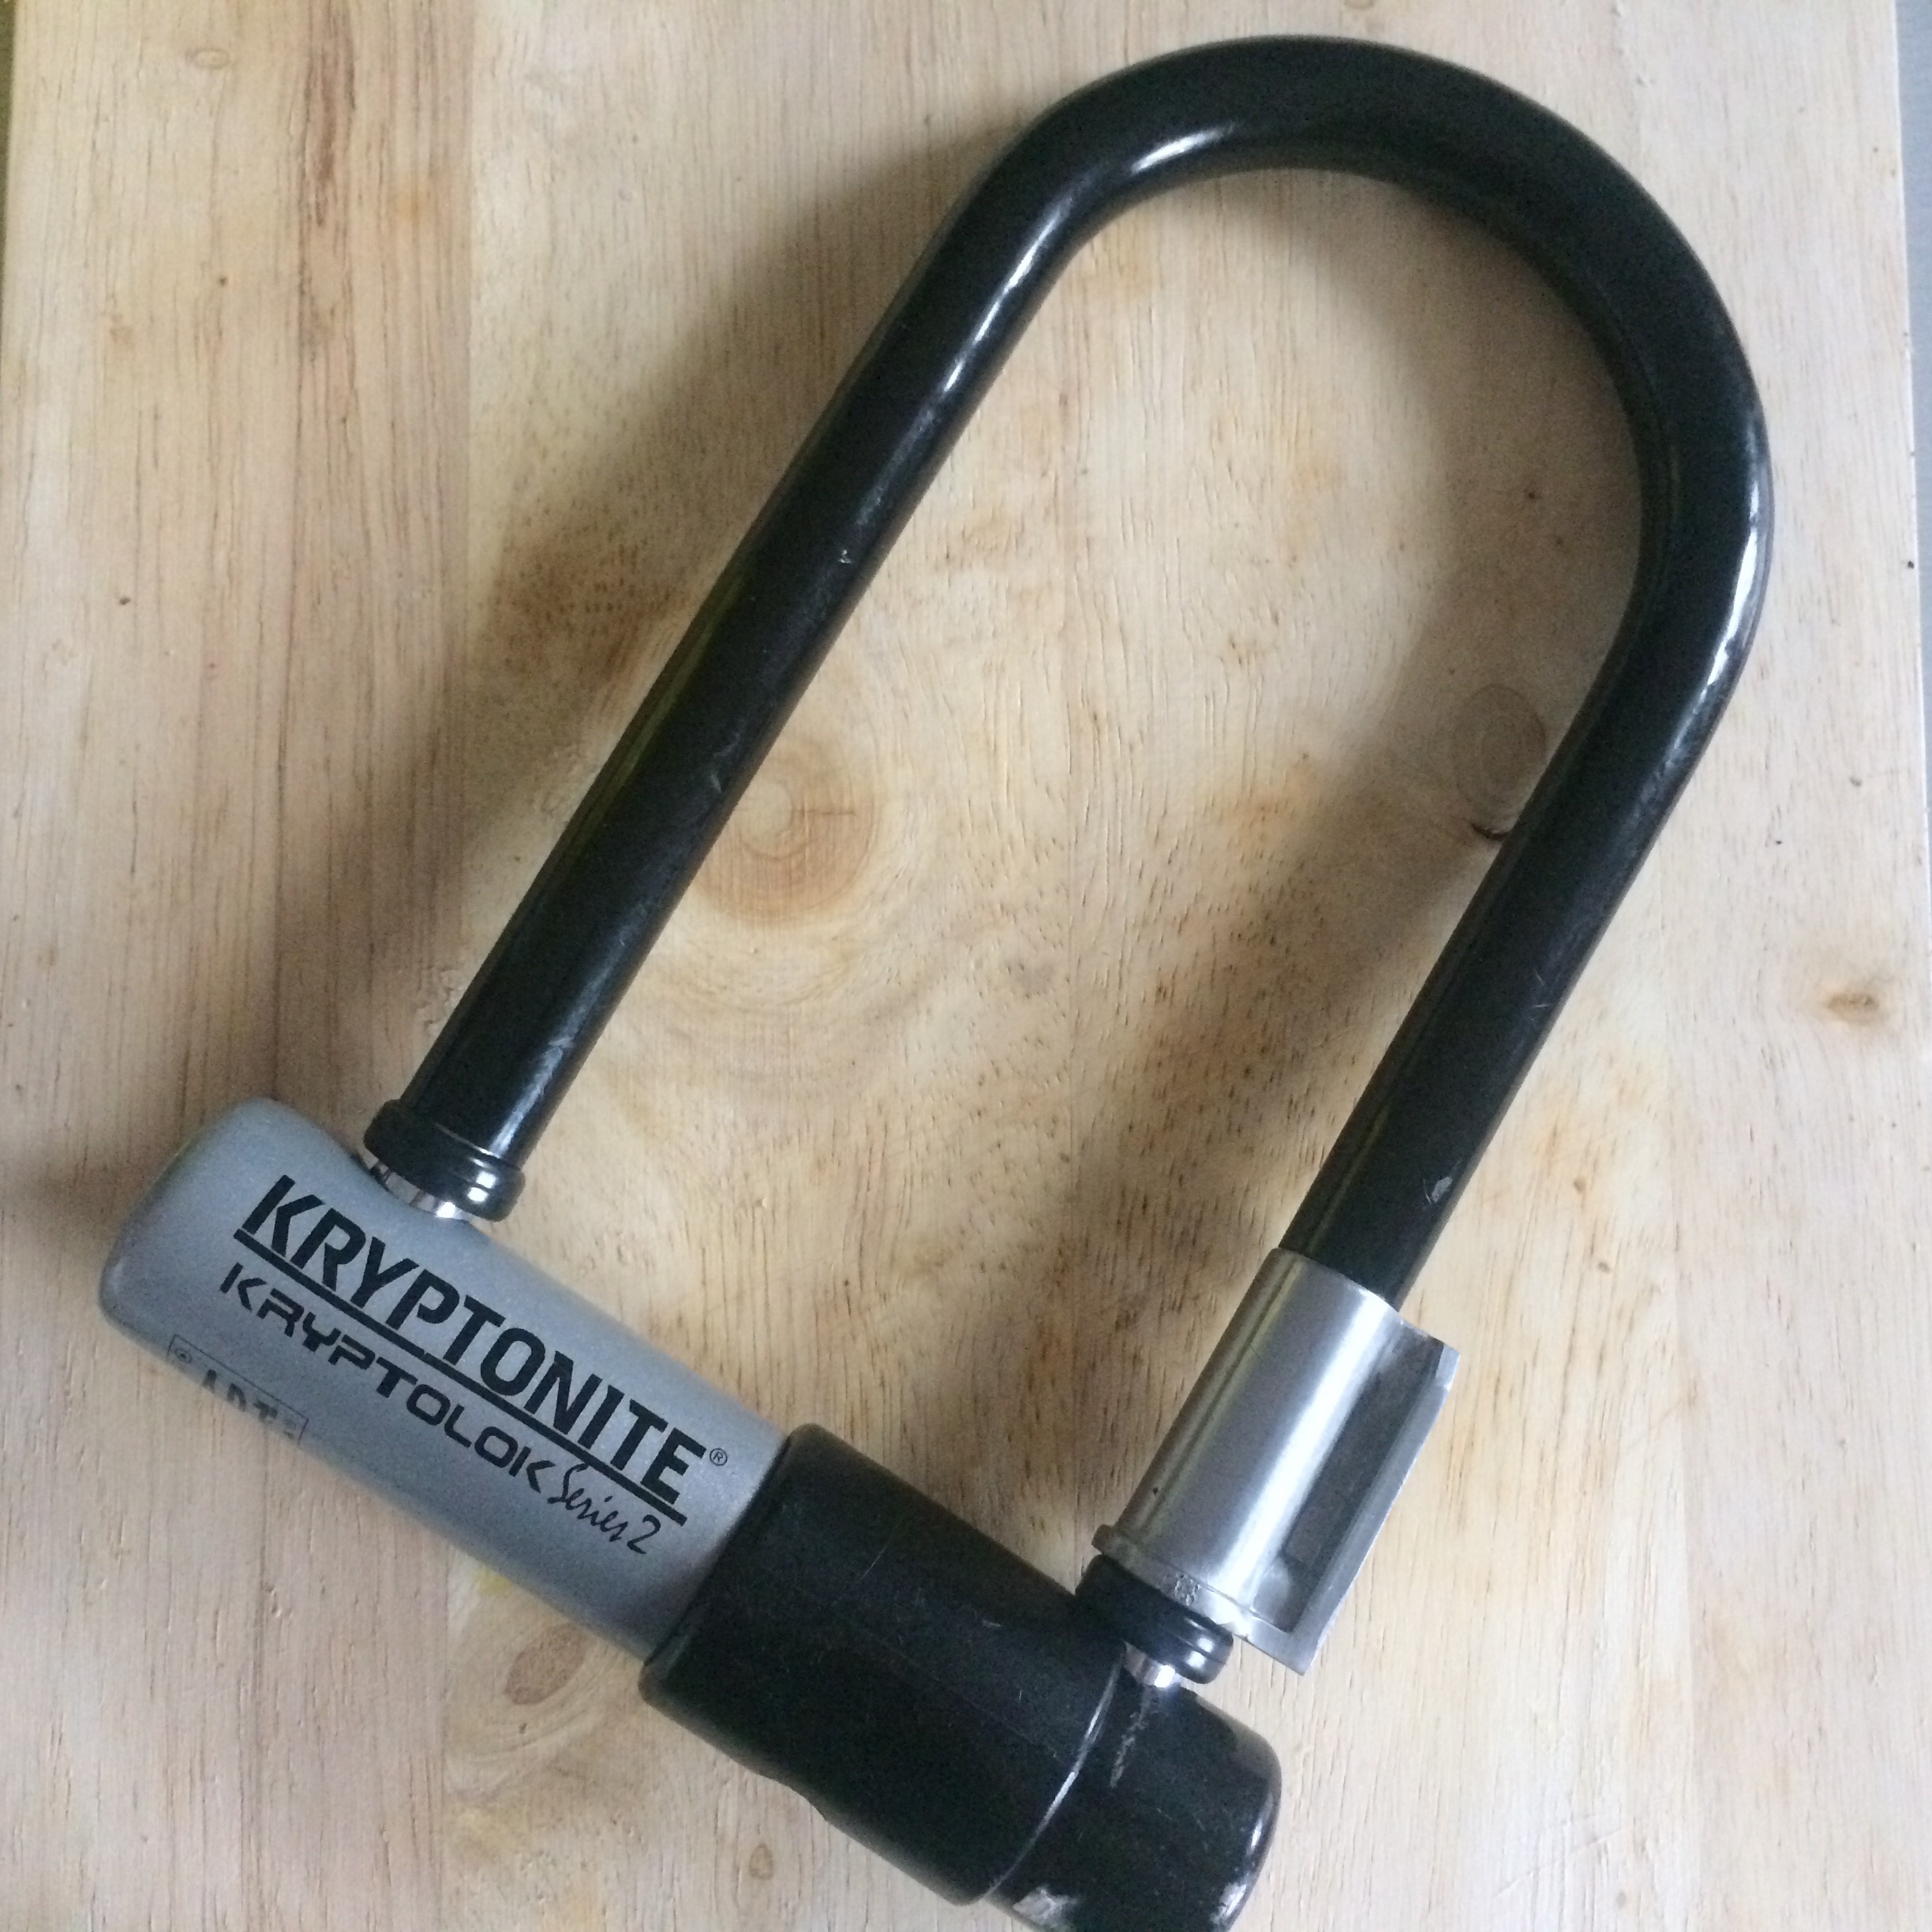
Physical: Unlike other U-locks this lock is strong and portable. The lock will fit most of the poles found in a city and you always will be able to lock you frame with your front tire. The actual U of the lock is a 2cm thick metal with a rubberized cover.
Electrical: The keylock and U-element combined results in a conductive whole.
Structural: The kryptonite site states the U-lock as “hardened performance steel”. It indeed feels like it could stand all of the elements. This will hopefully do the job against possible bike theft.
Perceptual: Because of the size the U-lock is not heavy. The rubberized cover for the U element does give the lock a softer feeling.
Aesthetic: The gray and black tints used in this object display strength and toughness.
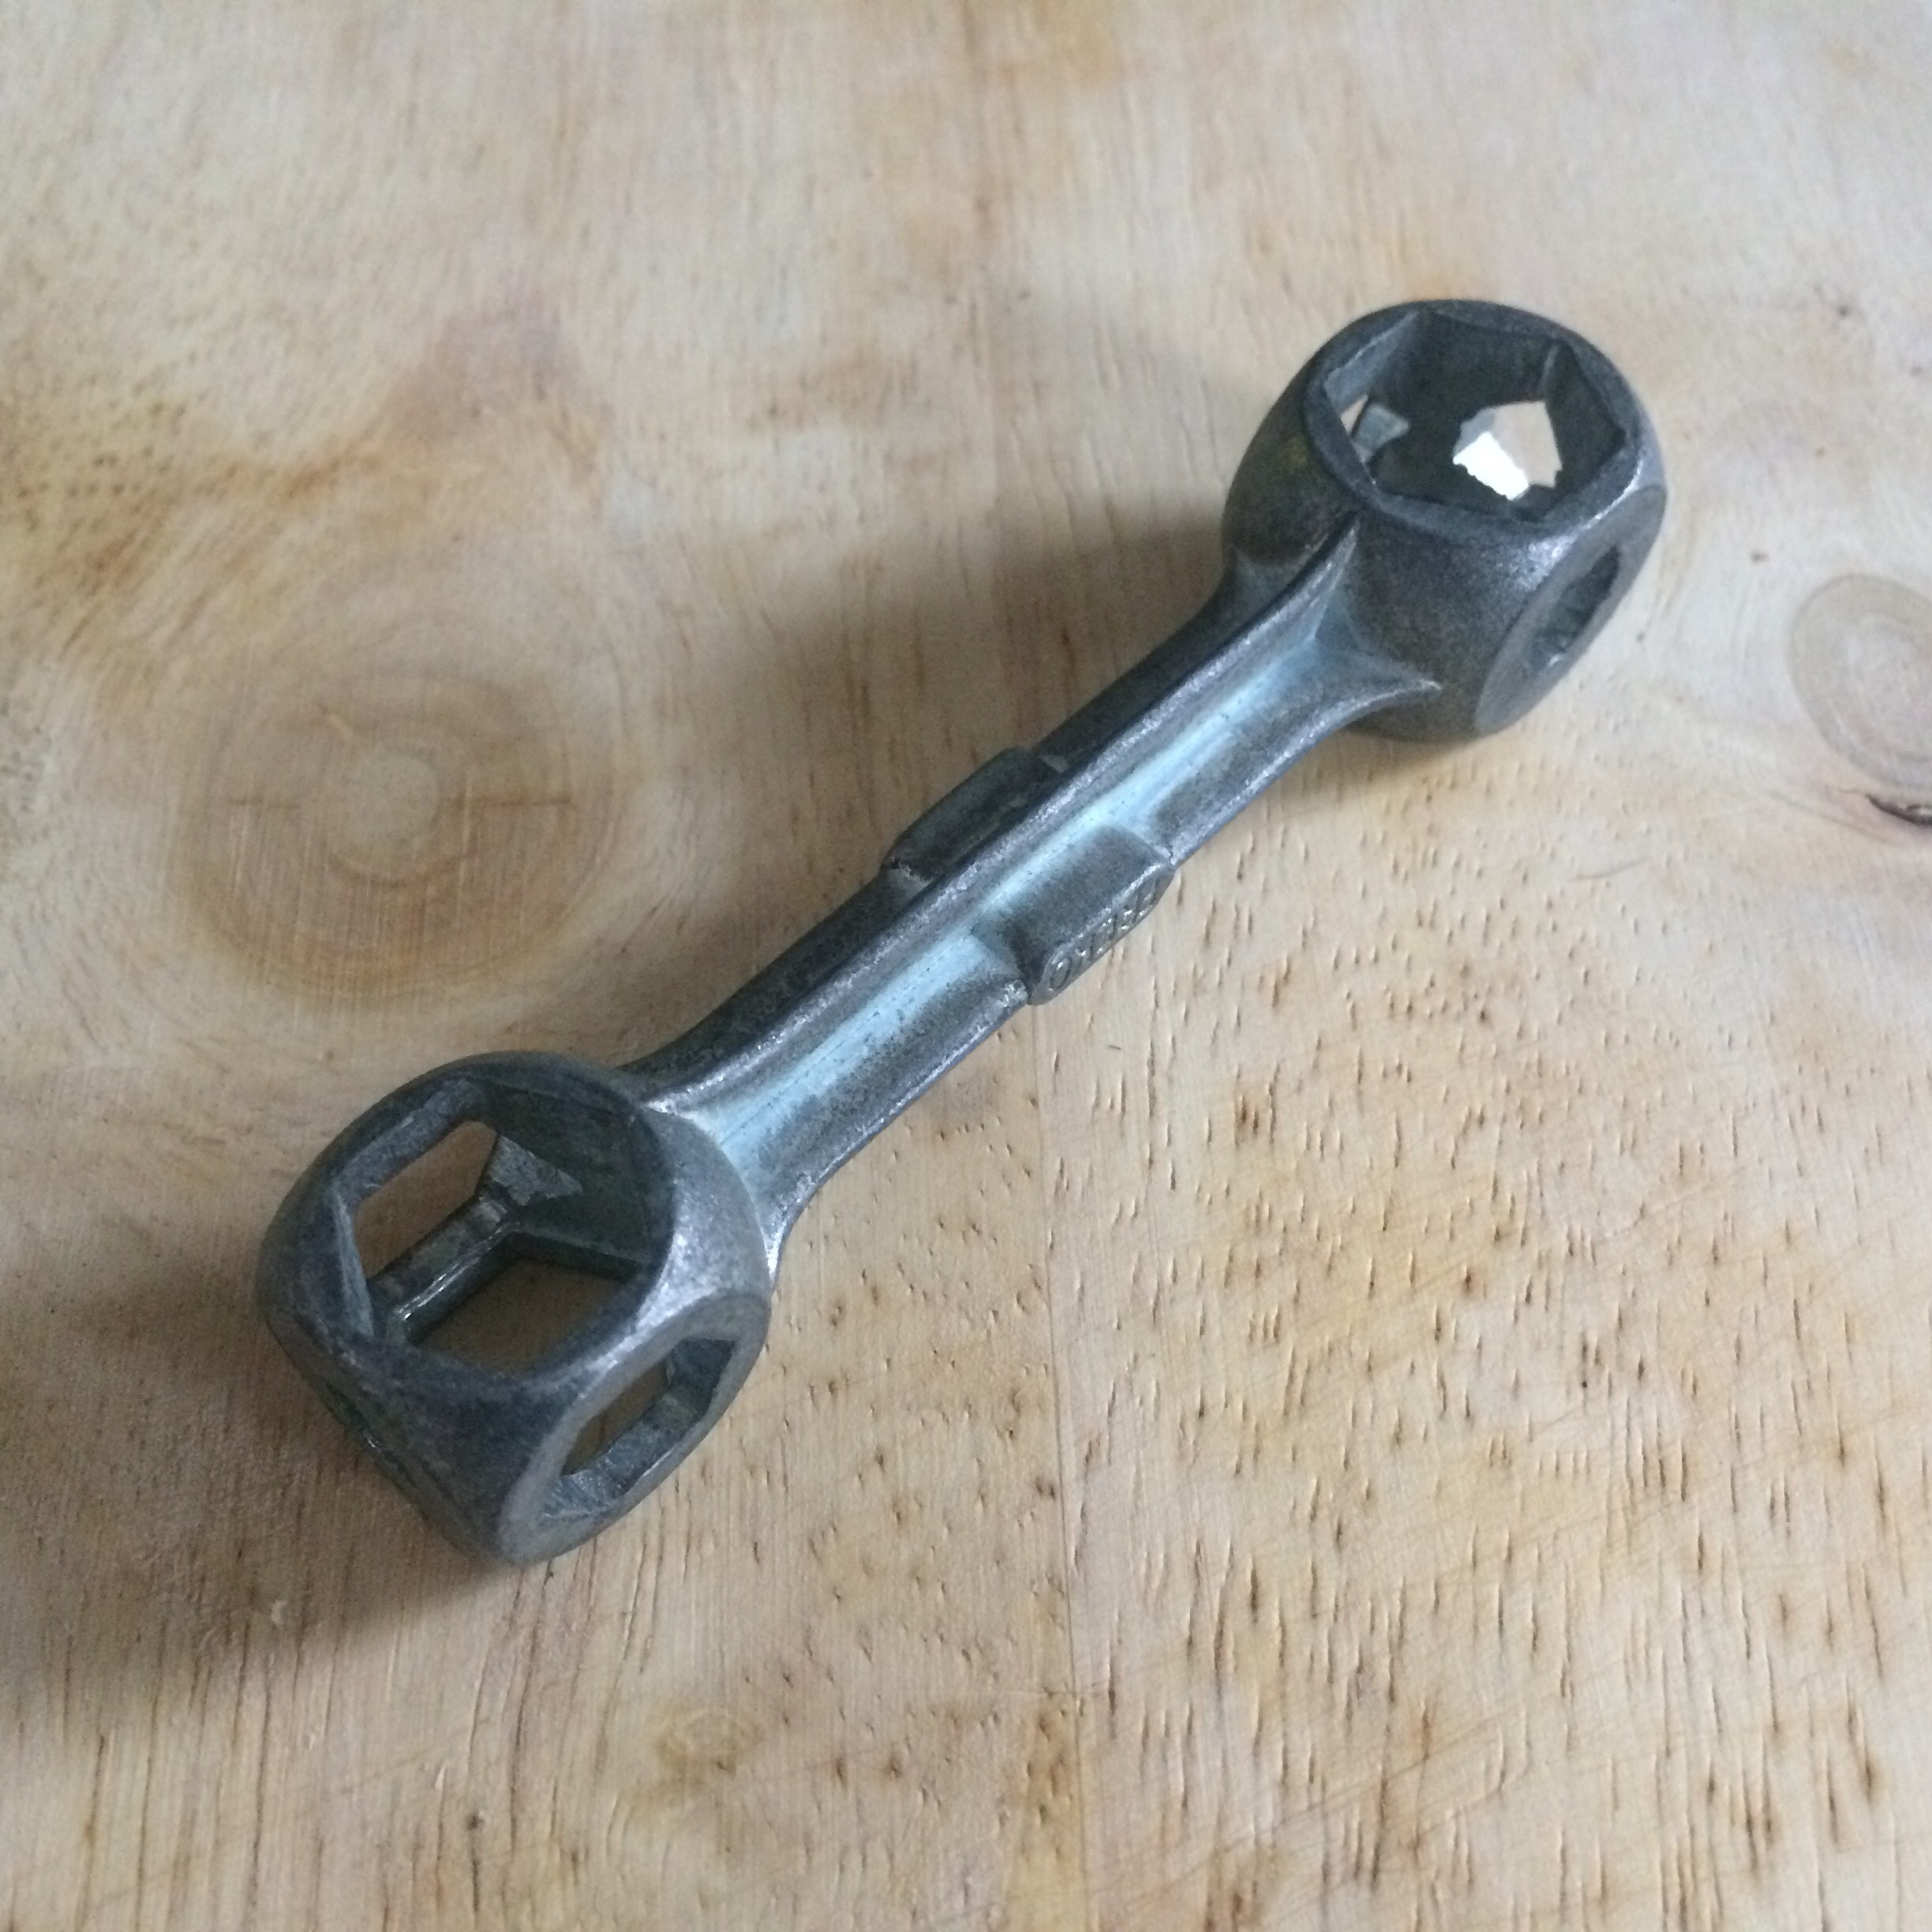
The compact wrench
Physical: The wrench does harnas the functionality to cover nuts ranging from 5 till 15 mm. This is done by making both sides functional with 5 nut sizes.
Electrical: The wrench is made of a single conductive material
Structural: Impossible to bend by hand. Can rely on the product to tighten my bike nuts.
PerceptualThis product displays functionality. It does not feel heavy in the hand. The shape of the handle gives the user control over the funtions of the wrench.
Aesthetic: Single color used in the product. No nut sizes mentioned anywhere on the wrench.
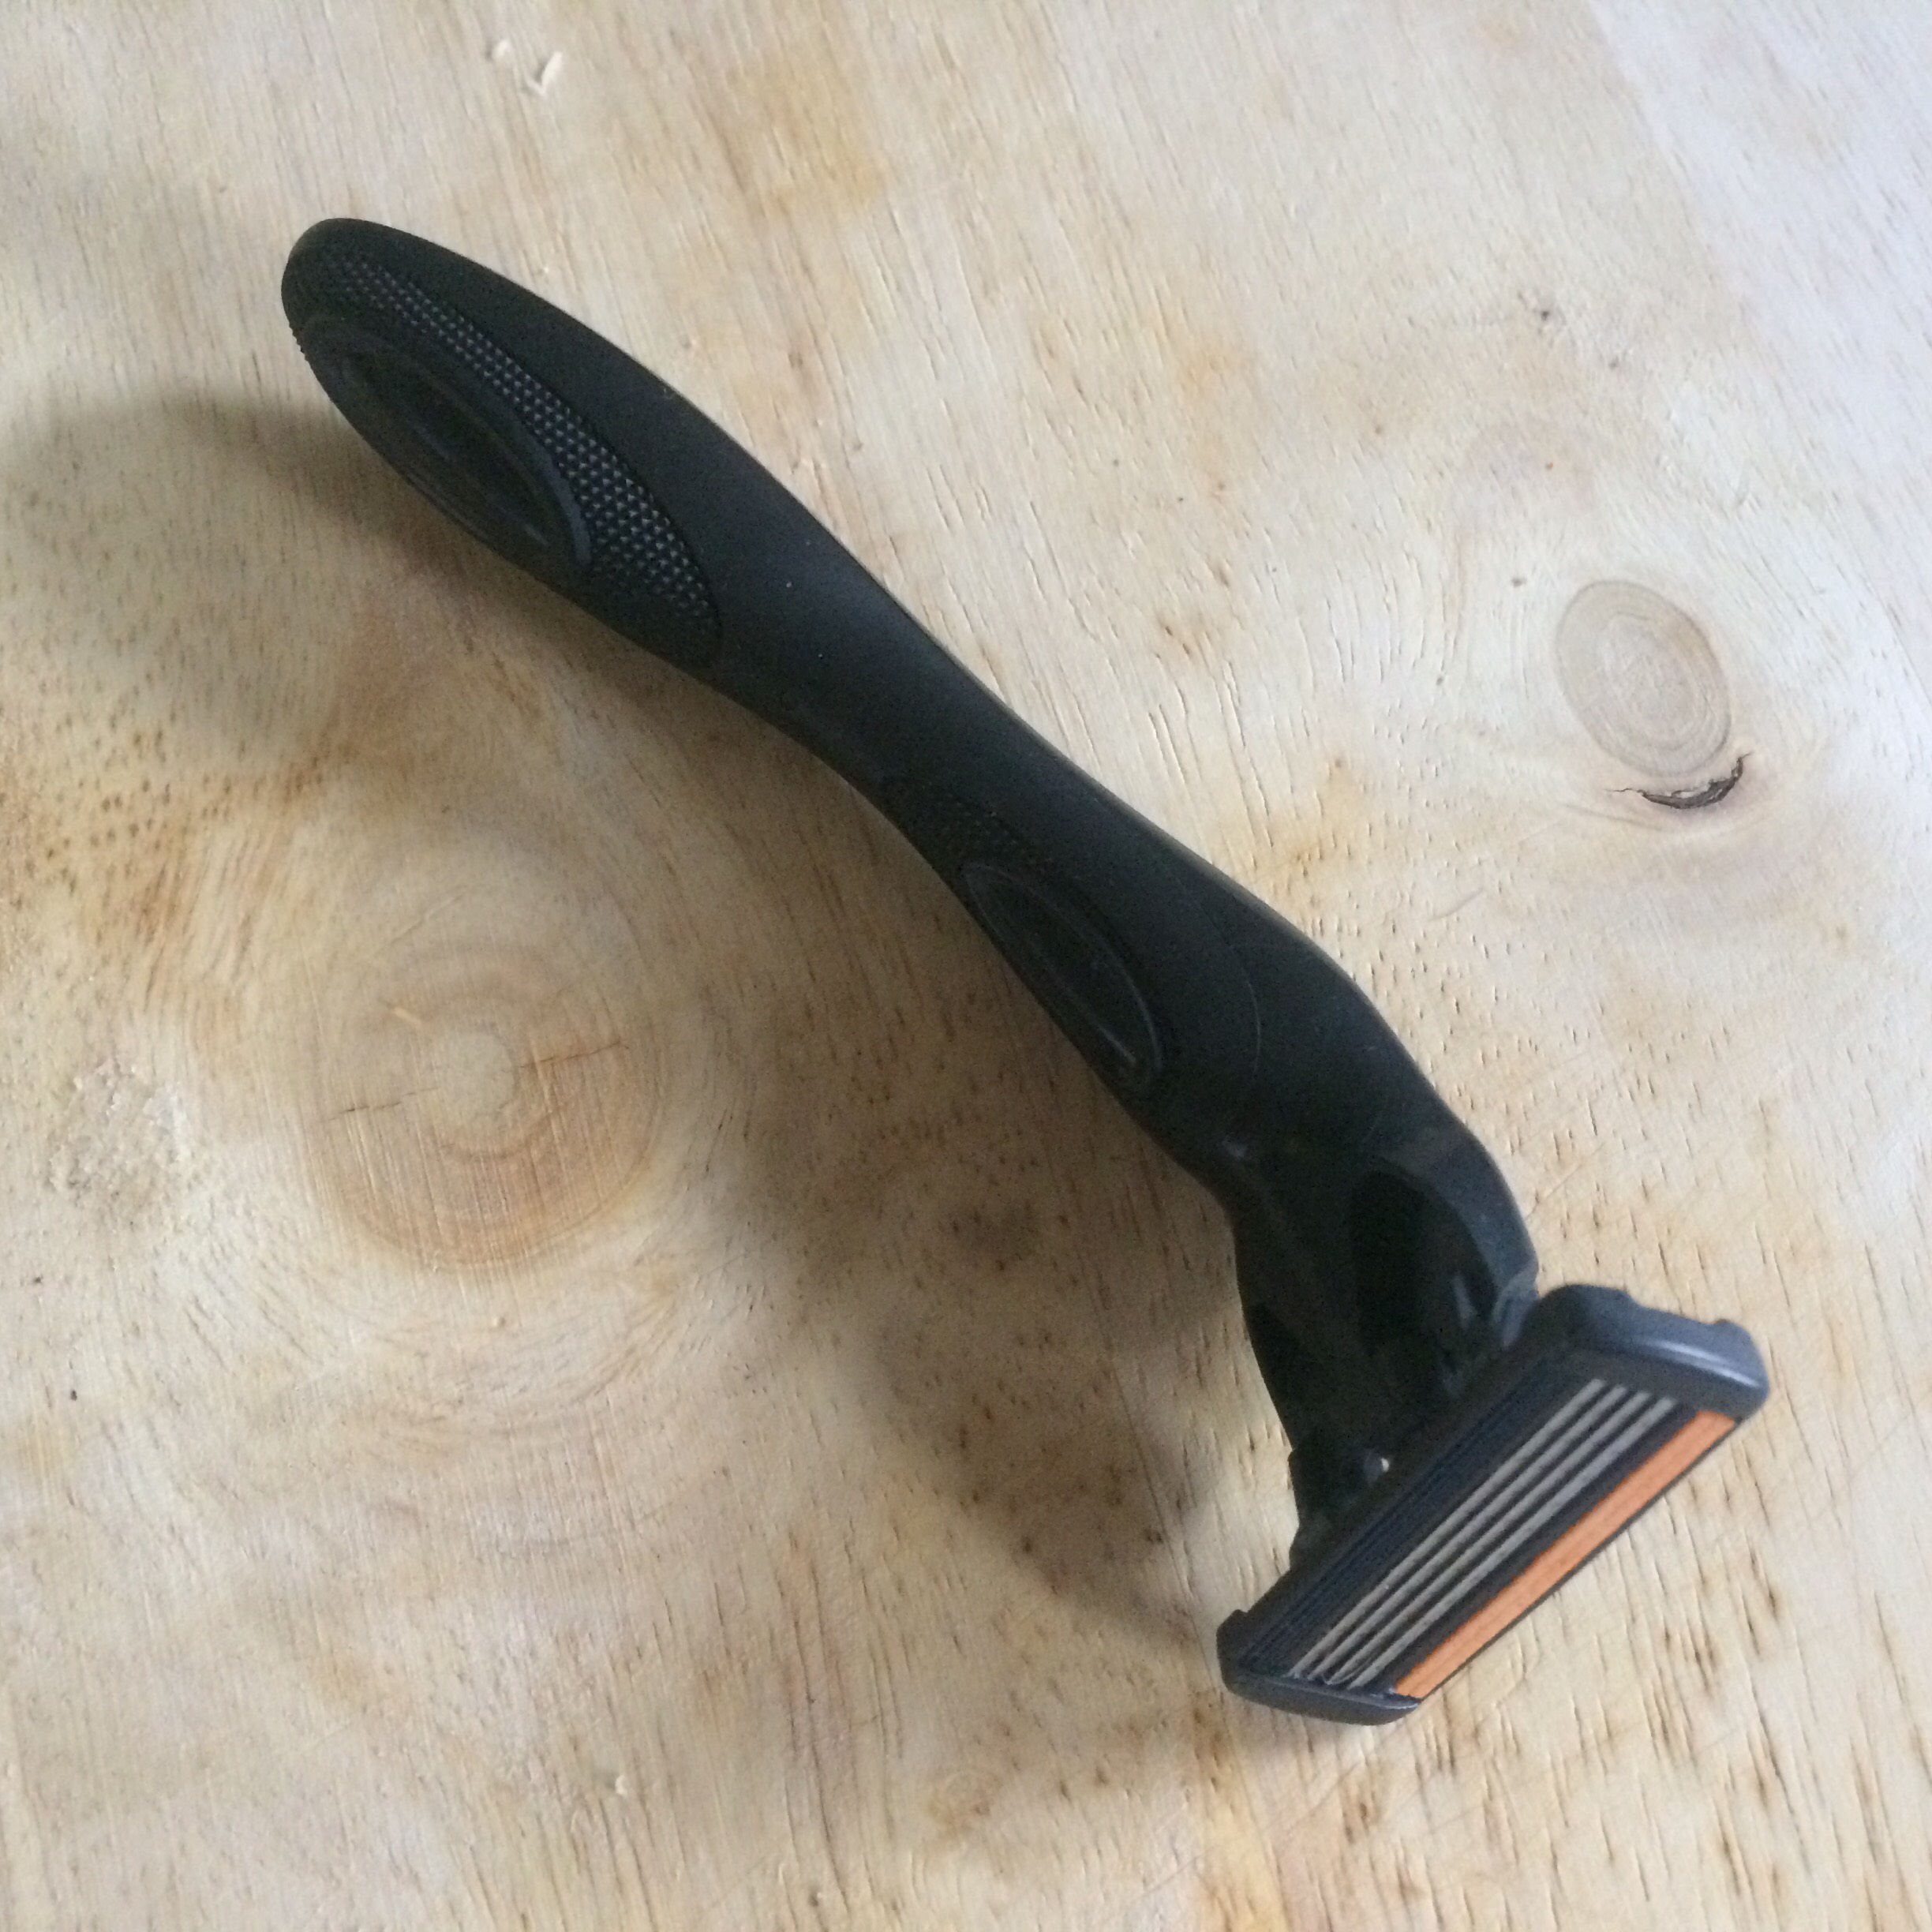
Razor blade
Physical: looks like a toothbrush with, instead of a brush, a razor blade on the end.
Electrical: The handle is plastic and not conductive. The only part of this razor which is conductive are the actual blades. The blades are not connected to eachother so only a single blade can be considered conductive.
Structural: The razor blade is made of a specific sort stainless steel.
Perceptual: The whole product is light so that an user will not exhaust himself while shaving. It feels good in the hand while using it.
Aesthetic: The dark colors used represent that it is manly to shave yourself. Female razors mostly have lighter colors.
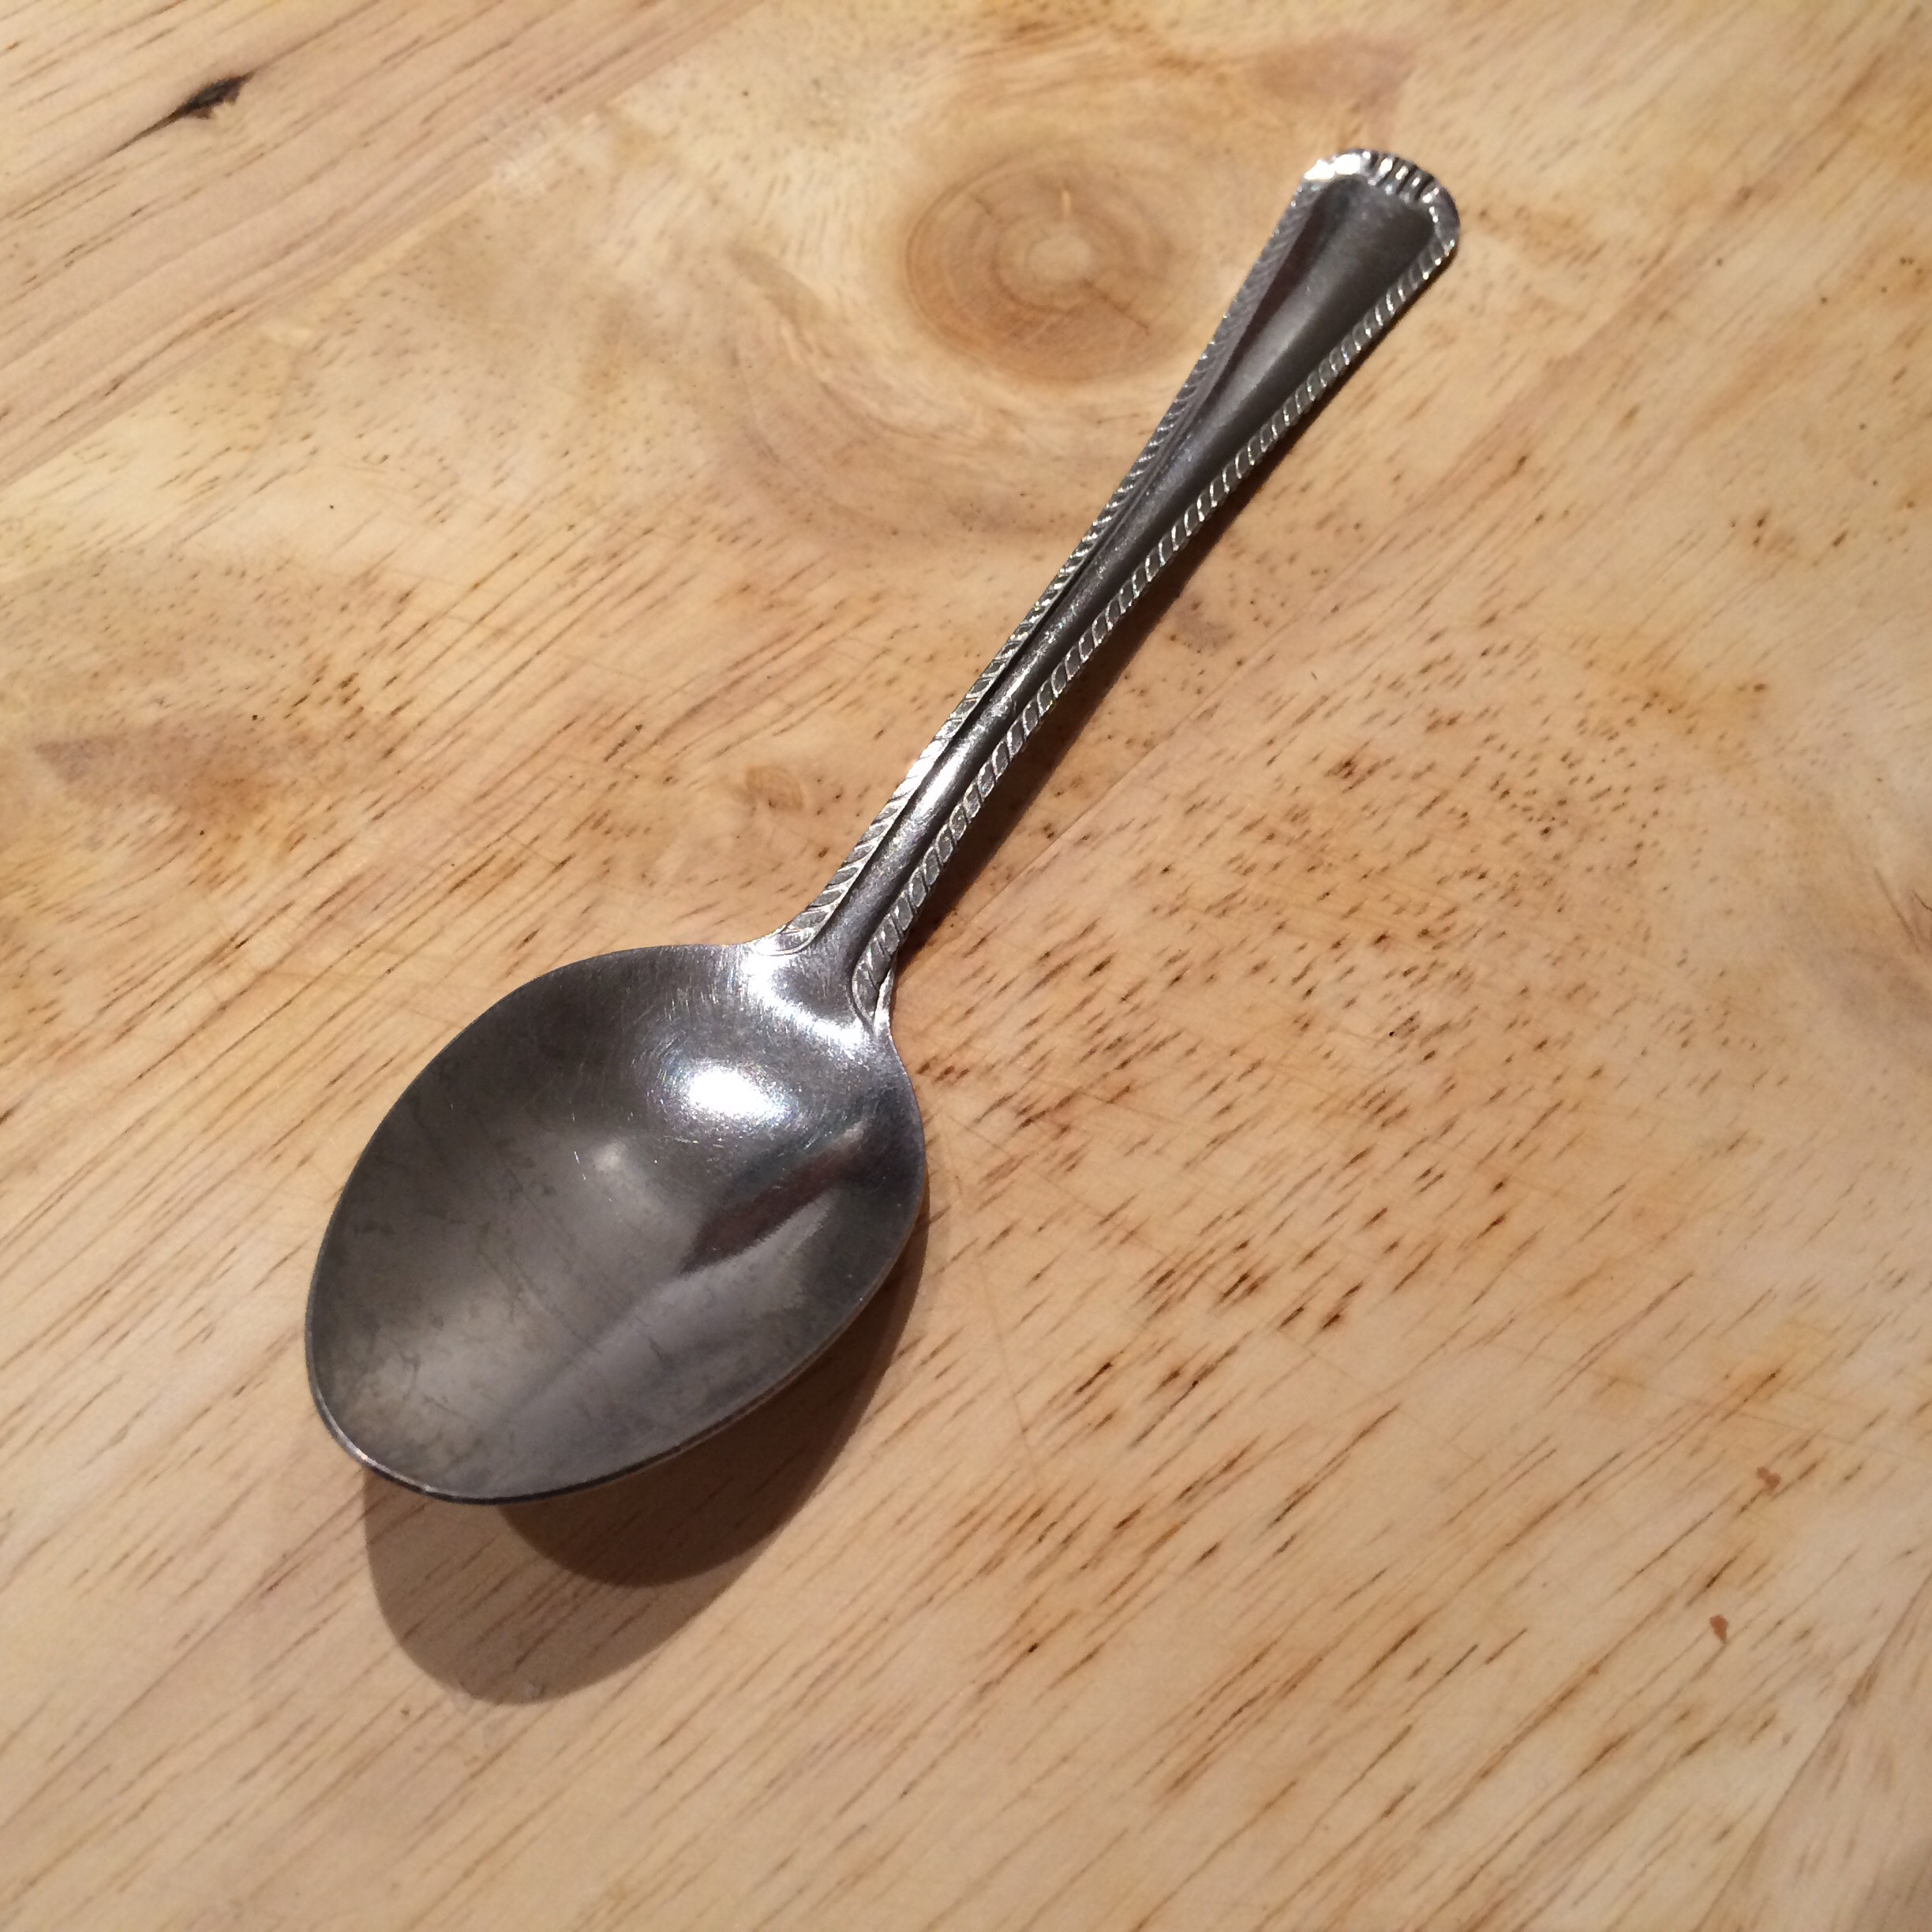
A spoon
Physical: Long shaped object with a small bowl shape on the end of the handle.
Electrical: The spoon is conductive as a whole.
Structural: Made of stainless steel so that it will not degrade (rust) when using with all sorts of substances.
Perceptual: This spoon is light in weight. The handle is long and curvey. The head of the spoon is eclipse formed and does feel good in when using it.
Aesthetic: This spoon is an elegant object. The object is curved and does not have sharp edges. The handle of the spoon is ornamented with a stripe texture. This makes the spoon feel classy.
Description
The spoon is one of three very important objects which are used daily by humankind. It perfecty serves the purpose of transporting food from the (kitchen)source to the (human or kitchen)destination. Both the fork and knife could also do this, but the spoon is the undisputed winner for containing liquids and substances. This is because the spoon is shaped like a bowl. The bowl creates a volume and is thus able to harness milliliters of various substances.
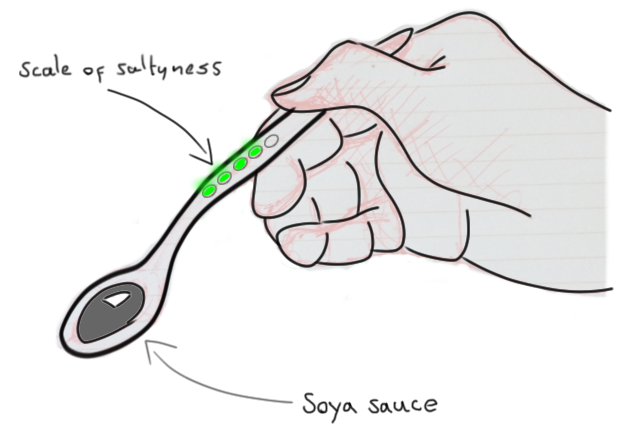
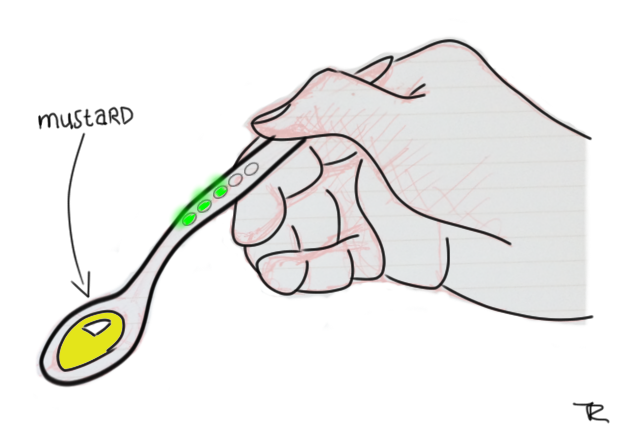
In the cooking jargon the spoon is used a lot. For example whenever a recipe needs a certain ingredient it tells the user to “add a teaspoon of ingredient x”. In my eyes a very vague instruction because it does not tell in what magnitude this ingredient affects your recipe. Lets say you have to add a teaspoon of salt. This information does not tell the user how it affects the saltiness of ones meal. There should be a way of measuring this effect.
Thus I created the salty spoon. Based on the idea of the saltier a substance or liquid is, the more it will conduct electricity. This spoon can determine how salt a liquid/substance is. With this spoon there is no such thing as too much/little salt in a dish.
In the social context cooking is part of establishing serious friend- and relationships. Making a dish for other people makes yourself and others feel good. People have the possibility to eat something nice which you just have made. The social aspect of eating with other people is huge, whilst enjoying a meal there is room for serious in-depth conversations. After having people to enjoy your food, you probably get an invitation in return in which they offer to eat at their place. In my opinion good food stands at the base in this social construct. Thus why not help one in making the food perfect?
Spatially the salty spoon is used in the kitchen environment. It is an object which looks like an ordinary spoon but has the extra functionality of being able to determine saltiness. Temporally this spoon should be given from generation to generation. Everyone needs to have the opportunity to cook perfect meals.
Interface description
Imagine you have a jug of salty soya sauce. You need to add some of the soya to another liquid to make it a bit more salty. With a normal spoon you only control the amount of a certain addition. With the salty spoon you also have the ability to determine the effect of certain added amount.
When adding ingredients with the salty spoon a LED will tell the user if the ingredient did make the meal to salt. When the meal is too salt all 5 LEDs will be on. When there is not salt at all, zero LEDs will light up. Everything inbetween (2,3,4 LEDs) are the okay levels of saltiness.
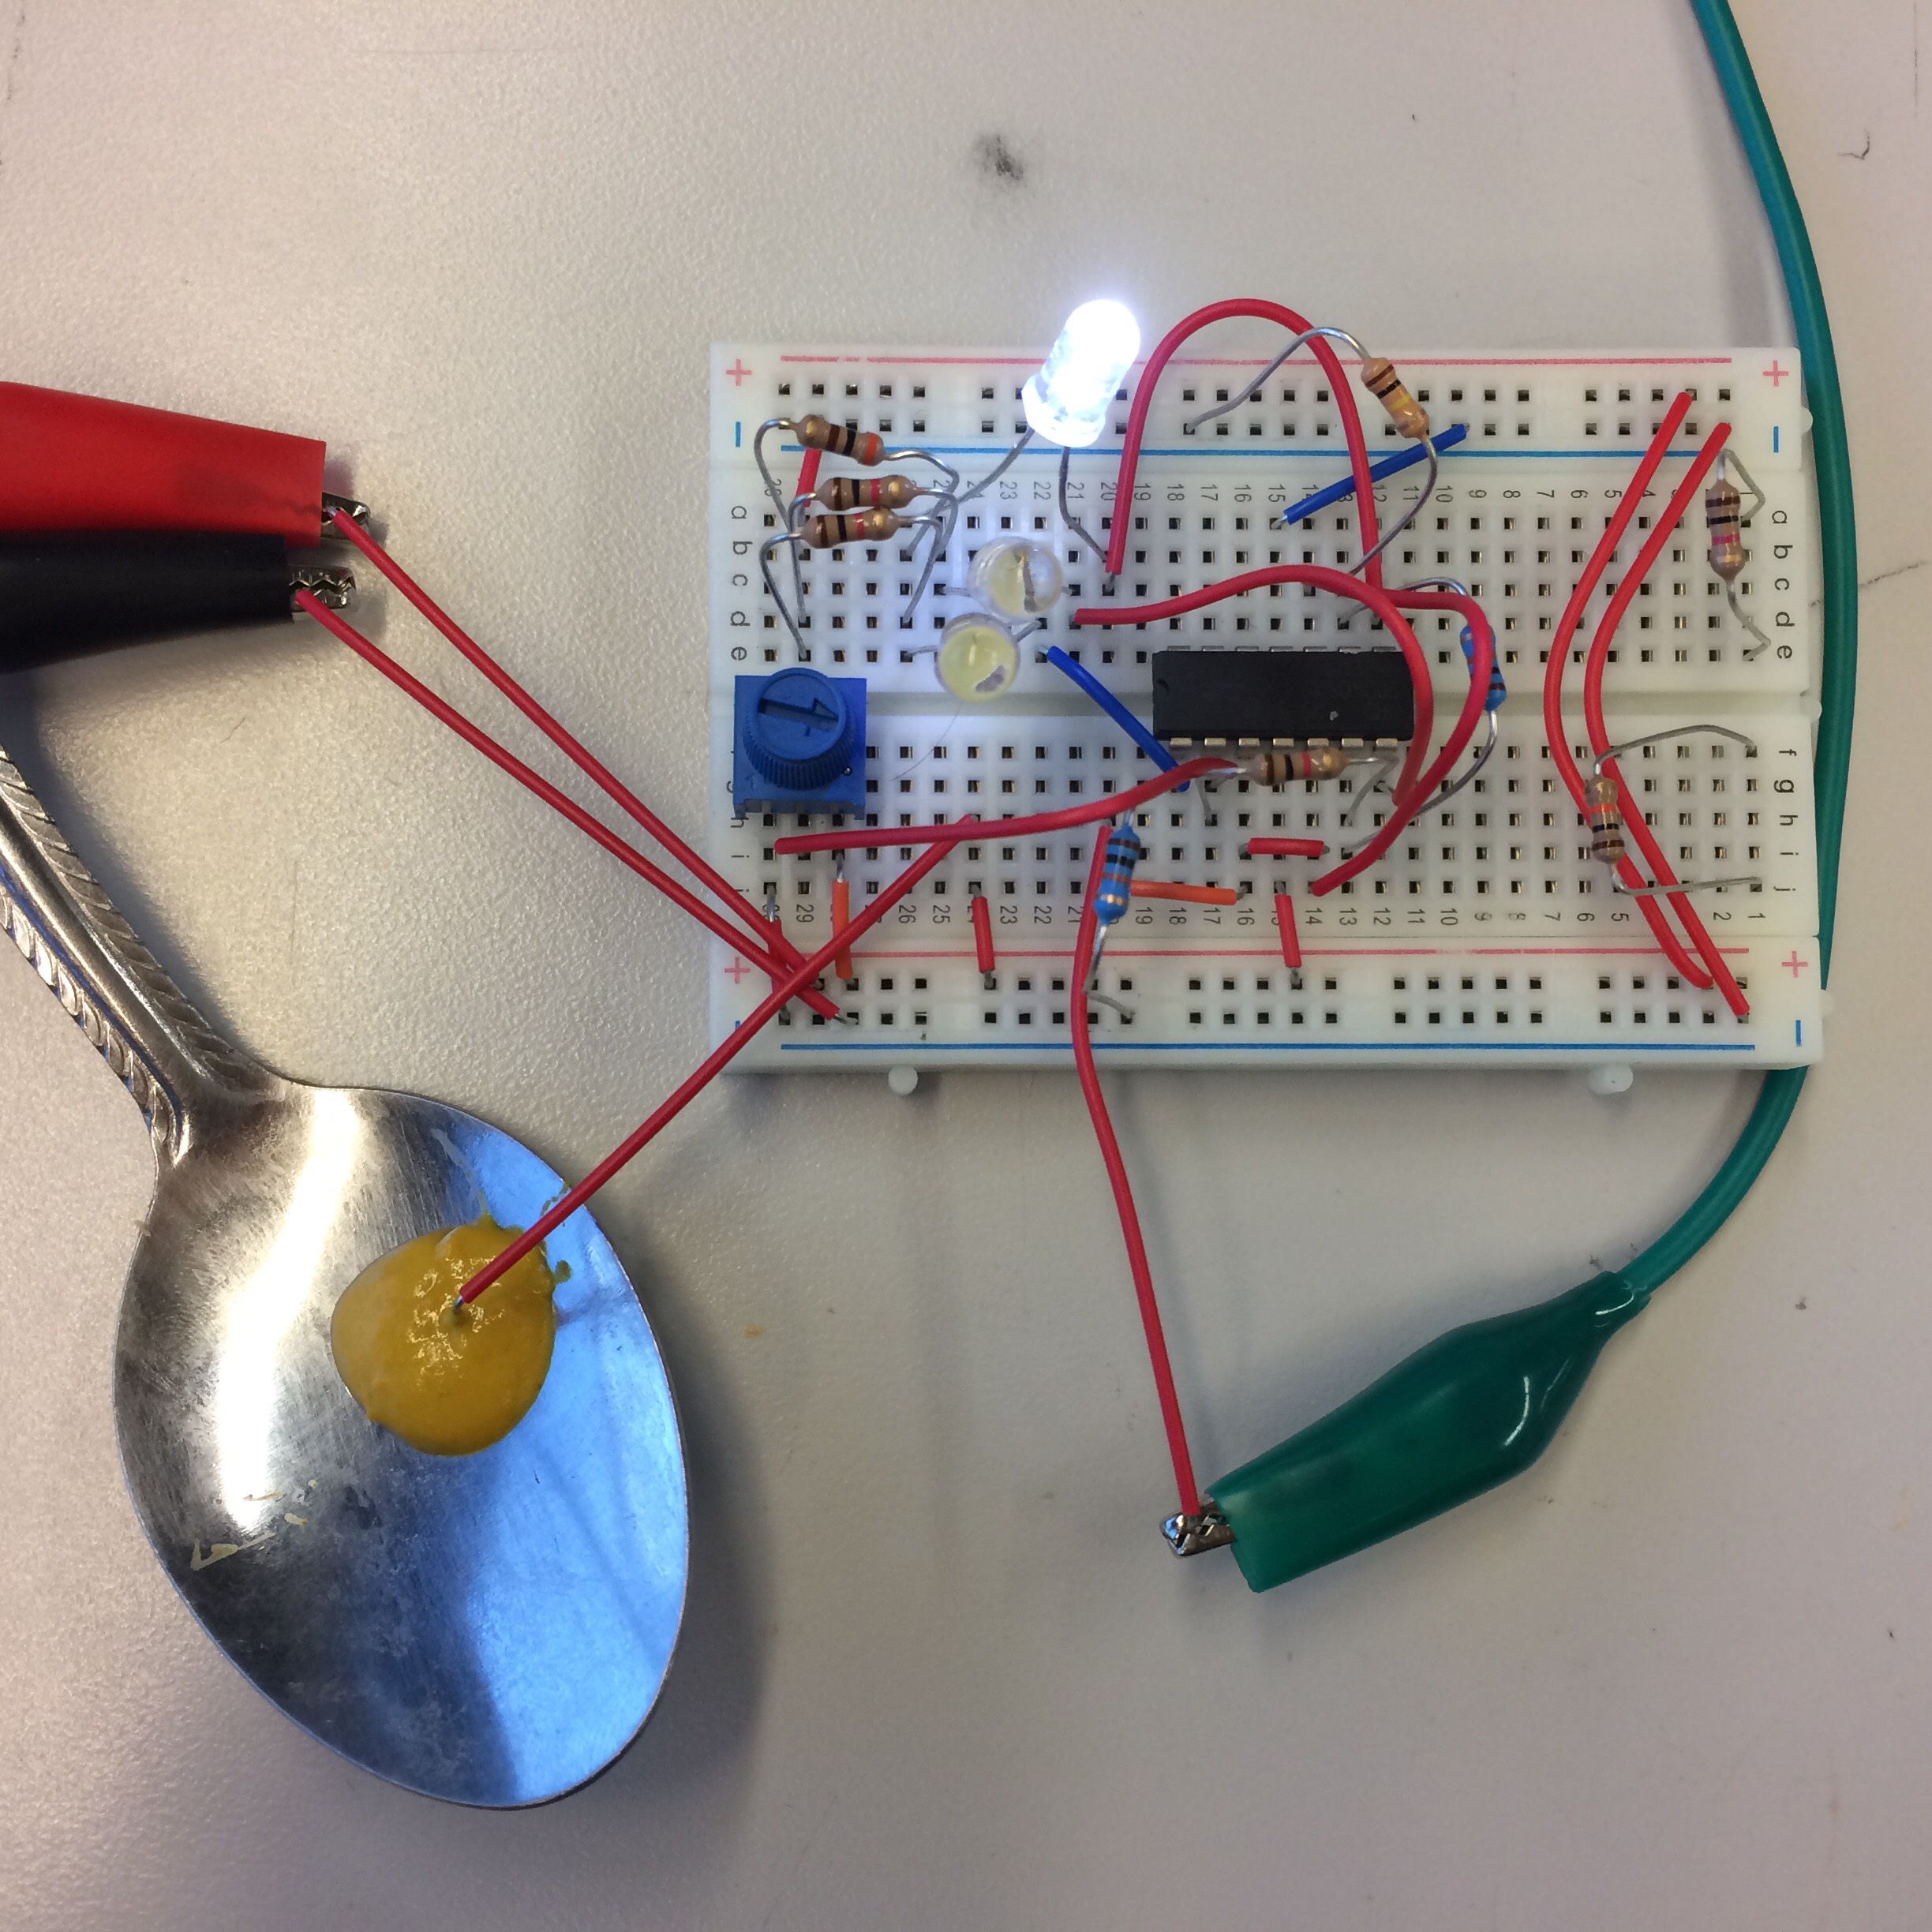
The ideal final form of the salty spoon is just being an ordinary stainless steel spoon with all of the technology integrated. But for now the spoon is just an ordinary spoon with a hooked up breadboard.
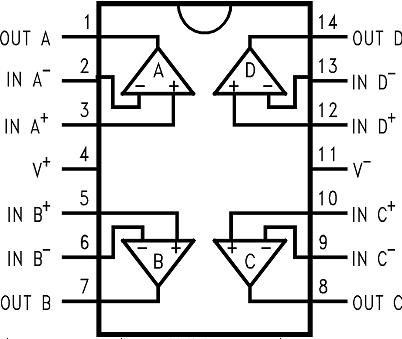
Breadboard description
The main part of the breadboard is the op-amp (lm324). The op-amp is a voltage comparator in which the main idea is to compare the input- and reference voltage. Depending on the outcome of this comparison a LED is on or off. Since the lm324 has four comparitors you can build a breadboard which has more than one reference point. Because there are four reference points you have the ability to drive four LEDs. Each LED will refer to a different amount of voltage which is able to flow through. The reference voltage is determined with a potentiometer. The circuit will be driven by a 9 volt battery.
Ideally all of the comperators should be used to give a most precise reading of the amount of voltage that can flow through the salty liquid or substance. But first, to test the concept, I will build a breadboard with a single comperator.
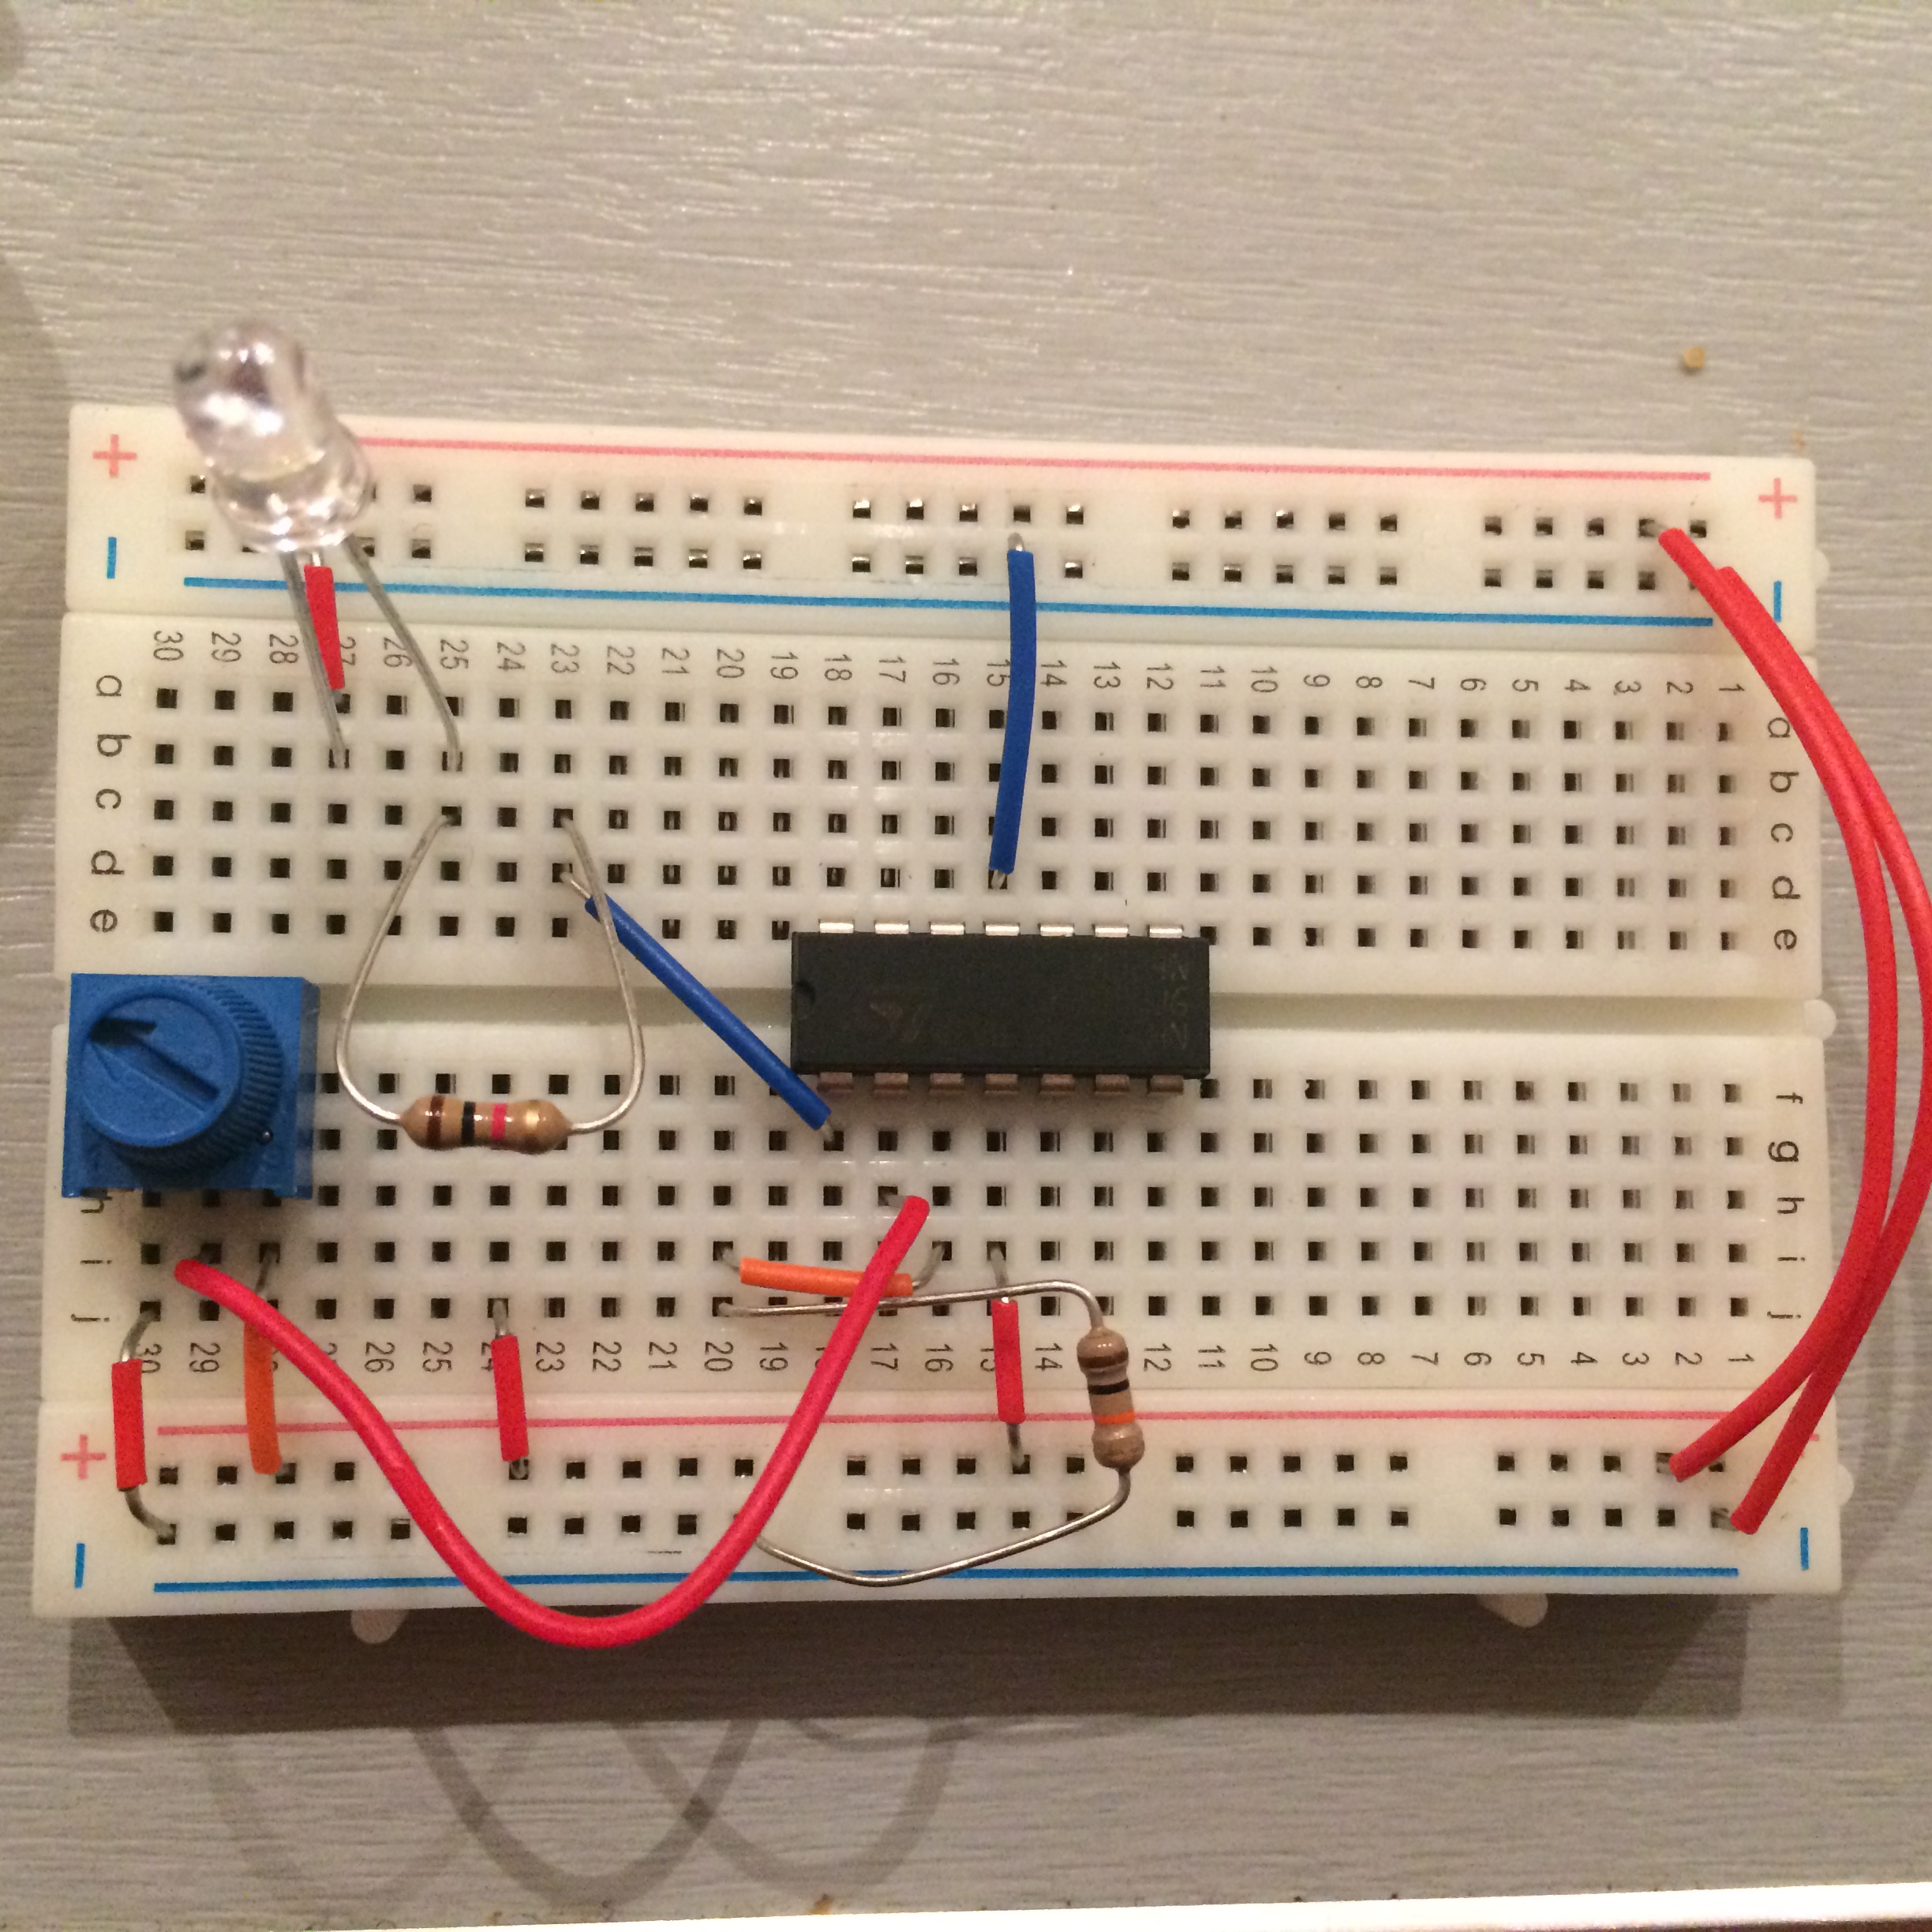
First breadboard design
The first breadboard design used 1 comperator which compared the input of a potentiometer (0 to 9 volts) to the input of a photocell. The setup worked and I had the ability to shut down the LED by creating a shadow on the photocell. The photocell can not be used in determining the saltyness of various substances and liquids so I swapped it out. Instead, I used two wires (+ and -) which both can be connected with any liquid or substance. By doing this and tweaking a bit with the potentiometer I was able to make a distinction between water and soya.
The next step would be creating the ciruit where 4 reference voltages are being compared to 1 input voltage. Hopefully this will create the LED scale of saltyness
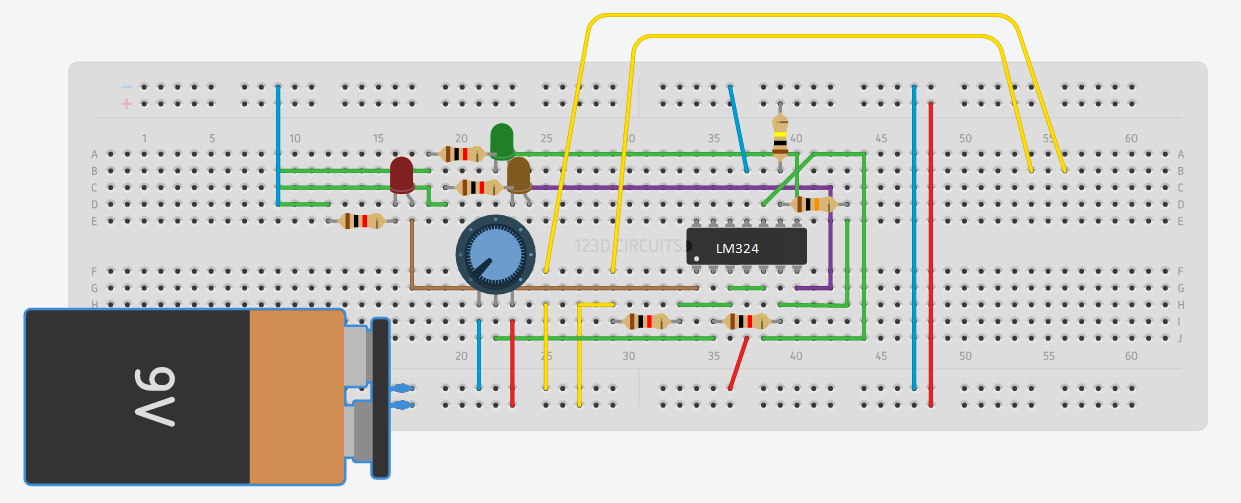
Final breadboard design
The final breadboard uses instead of only one comparator 3 comparators. By (re)comparing the voltage every time I was able to distinguish different amounts of voltage flowing through substances. The reference voltage is managed by a potentiometer. The current flows from one comparator-input to another with a increasing range of resistors. These resistors are 1k, 10k and 100k. The three LEDs are parallel to eachother. So whenever 1 LED is on the voltage flowing through the substance is the highest. The lower the voltage, the more LEDs are going on.
Storyboard
The general usage of the saltyspoon is simple. Whenever adding ingredients which contain salt the LED will display the level of saltiness you are going to add. The spoon can also be used to determine salt levels while stiring. Ideally, by using the salty spoon, food will never be too salty anynmore!
There in one major flaw when in the User experience. since there is a voltage running through the salty spoon user are strongly advised not to insert the spoon in the mouth when it is switched on.